Planning a DIY Festive Photoshoot for your Handmade Business
When planning your promotions and marketing on them run up to the Christmas season, curating some gorgeously festive styled images featuring your beautiful products is a fabulous way to to maximise sales.
And its always good to be able to hold a DIY photoshoot for your brand at any time of year but a festive shoot is a great addition to your festive marketing plan.
But festive styling can be tricky and it is important to create festive stylings that elevate your products and evoke that Christmas spirit without being overly cheesy! Here are my top tips for styling festive shots and holding a DIY Festive Photoshoot for your handmade business.
Choose your feature products
First things first. It is important to think about the products you want to feature in your festive imagery. I would break this down as follows:
Your best selling products
Any limited edition products/ Christmas offers
Festive wrapping
Gift vouchers
By focussing on your best selling products and your limited edition products and Christmas offers in your festive imagery you are looking at creating time-based marketing content right as your customers are gift shopping.
And of course showing off your Christmas wrapping is a great way to demonstrate your excellent customer service and show that your products are ready to gift which is a time-saver for customers.
2. Look for Festive Inspiration
One you have decided what you are going to feature in your festive images, it is time to look for inspiration. I do this in two ways:
Create a private Pinterest Board for Festive Styling
I like to create a private Pinterest Board for festive styling. This gives you a bank of images from which you can really hone in on the style you are looking for and pull out key themes. Seeing a collection of images is really powerful when styling as you start to notice similarities in the kind of images you are drawn to..
2. Create a Festive Styling Collection on Instagram
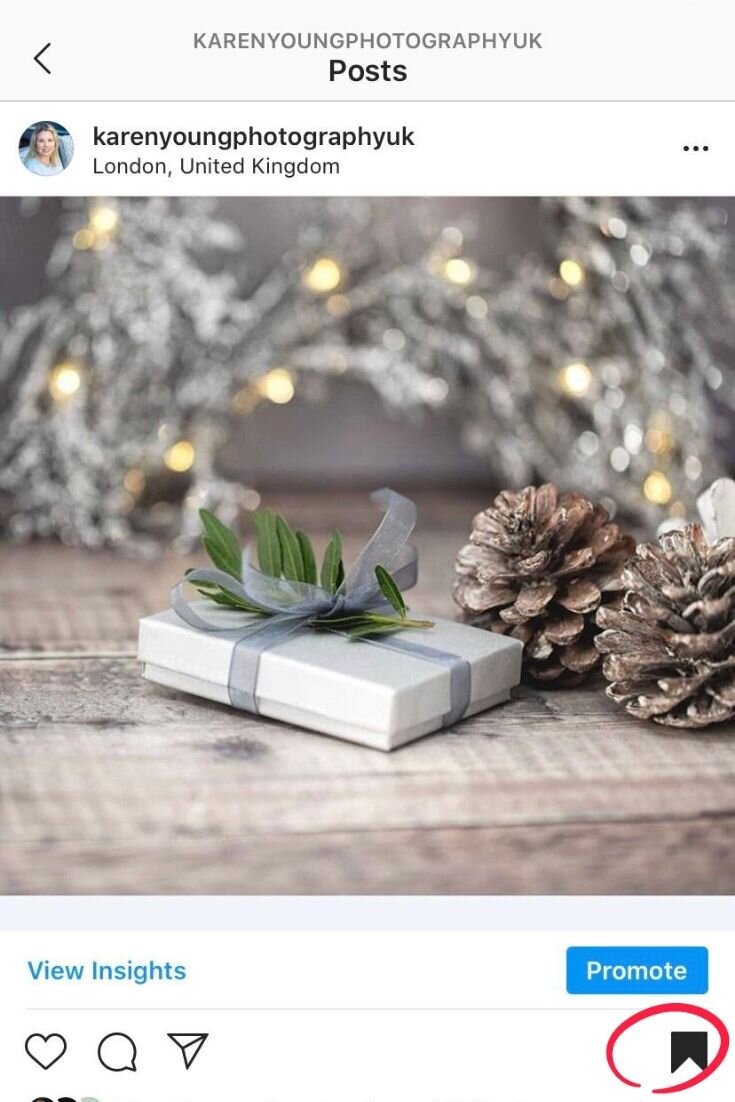
The other way I like to get inspiration is by creating collections on Instagram. If I see an image that I like when searching hashtags or scrolling through my feed, I click on the little flag icon under the image.
Then I can either create a new Collection Board or add to an existing one. It’s a great way of saving images and posts that inspire you to go back to later.
3. Pull out the Key Themes
Now the fun can really start. Once you have created your inspiration board or collection, really look at the images you have been drawn to. Pay attention to things like:
The lighting used - is it soft, is it moody, is it dark and dramatic?
The backgrounds - what kind of backgrounds show up consistently in the images you have saved?
The colour palette - are there colours, shades or tones that show up in multiple images?
Items that add height and texture
Props used - are there similar items that appear in multiple images or are there groups of props that you think work well together?
The angles that the images have been shot at - are you drawn to closeups, lifestyle shots or the likes of flatlays?
How much of the frame is in focus - is it all of the image, or just the main focus on the image?
Really try and dissect what it is about your inspiration images you like.
4. Create a Photoshoot Moodboard
Then its time to summarise those key themes into a shoot Moodboard. This can be so helpful in determining all the little details for your styling. You want to be sure to include images in your moodboard that cover:
Your shoot colour palette
Backgrounds
Props
Shoot angles
Lighting
You can create your Moodboard using good old foam board and cut images out and stick them onto the board, or you can create a digital Moodboard. Both work equally well. I have created a Digital Moodboard Template in Canva for you to use if you wish.
5. Then its time to create your photo prop shopping list!
By planning your Festive Styling this way it means that you can get really intentional about your prop shopping instead of buying lots of festive items willy nilly the you might not use.
You can find festive props almost anywhere from mid-end September onwards.
Don’t overdo it on the prop shopping front. I find it best to keep it simple so your styling doesn’t overwhelm your products. I like to following the following guidelines:
1-2 Backgrounds
1-2 items to add height or texture
2-4 Props
If styling flatlays you can get away with adding more props than standard festive shots.
Ideas for Festive Photo Props
Some great ideas for Festive props include:
Pine cones and festive foliage
Dried fruits, cinnamon sticks and berries
Fake snow
Fairylights and festive lighting
Wrapped christmas parcels and wrapping
Christmas decorations
Festive food and drink
Festive crockery and mugs
Festive fabrics and linens
Candy canes
Sparklers
Textiles in Festive colours
Christmas wreaths and centerpieces
Stockings on the mantlepiece
Christmas wreaths and banners
I have even been known to put up and style a Christmas Tree in October to take shots in front of a Christmas Tree!
Then buy or order those items (AND ONLY THOSE ITEMS) for your festive styling kit.
Make sure and add either some white tack or prop wax to your shopping cart if you don’t have some already.
6. Plan your Festive Shoot
Finally you can plan your shoot. I find it helpful to create a shot list so that I make sure that I capture everything I need to.
Remember to include some shots with some blank space so you can add text and details about your festive offers!
I have created a shot list template to help you. This helps you plan out your style set ups and your shots including angles.
I also like to either sketch out my styling (even rough drawings on where you are going to position items in the frame), or even better once all the props arrive play about with the position of each item before your shoot so you can maximise the shooting time on the day.
Block out at least 2-3 hours for your photoshoot and make sure that all your products are ready in advance and that you have:
The backgrounds you are going to use
All your props
Your products are clean, free of dust and ready to shoot
You have items such as scissors, prop wax or white tack to help you hold items in place
You have a charged camera, something to diffuse the light and some reflectors.
7. Edit your Festive Photos
Finally, you want to make sure that you edit your Festive photos so they look their best.
I edit my photos in Lightroom (the mobile version is free), but other apps such as Photoshop, Gimp, Snapseed etc will all work too.
I typically do the following to every image:
Crop my images
Brighten or Darken my images depending on the look I am going for
Increase the contrast slightly
Sharpen my images.
Remember that images you are uploading onto your website should be no larger than 200kb (and ideally under 150kb) or your website will load slowly.
And good luck with your festive shooting! Do tag me with any images you take using the information and templates included in this blog as I would love to see them!
And I wish you a fabulous season with heaps of sales to help you finish off 2020 with a bang!
Introducing my Christmas Styled Product Shoots
And if you want some help getting some amazing photos for your business on the run up to Christmas, I am delighted to announce my Christmas Styled Shoots!
These shoots are perfect if you want some festive shots of your products or your special Christmas packaging for your marketing on the run up to the festive season.
These limited edition shoots are running on the following dates:
24th September 2020
25th September 2020
8th October 2020
There are only 10 spots available and they are booking up quickly!
The Christmas Styled Shoot package includes:
A 20-30 minute styling pre-shoot questionnaire & consultation call
10 curated images in your own bespoke gallery styled in a festive theme - these can be close ups of individual products or group shots/ flatlays as preferred
1 style set up using my festive props and in-stock backgrounds (no bespoke props will be sourced but you are welcome to send any you want me to use)
High resolution files for print, & low resolution files for web
Return postage of products post-shoot (via Special Delivery)
Lifetime copyright release for use of images on your website, printed materials and social media channels
Beautifully edited images.
The early bird pricing for these shoots is £97
This price will go up to the regular price of £120 from the 5th September.
To find out more and to book, please click the link below


